Recently in Patterns Category

Cable Scarf Front and Back.JPGAfter I admired it, a friend of my SO's family gave me a lovely crocheted large doily (or small tablecloth) for a round side table. 

It's a pretty piece, though not something that has a place in our house, given our current decor.  In return, I wanted to give her something handmade.  Since she's not a knitter, I wanted to knit something for her.

I bought some cotton yarn to make potholders, but that didn't end well.  They were too stiff and the cream, beige, and green of the yarn didn't show off the knitting to the extent I wanted.  The potholders were too simple and just not worthy of her.  I gave up on them and I'll repurpose the yarn into some thing else later.

In the local yarn store, I saw a dark grey superwash (non-felting) Merino wool in the same brand I'd used before to knit a scarf in red.  I ordinarily wouldn't make something out of wool for a gift, but this wool is machine washable which makes me feel a little better about it.  Also, my SO assured me that the recipient of this particular gift would have no problem hand-washing a scarf if she needed to.

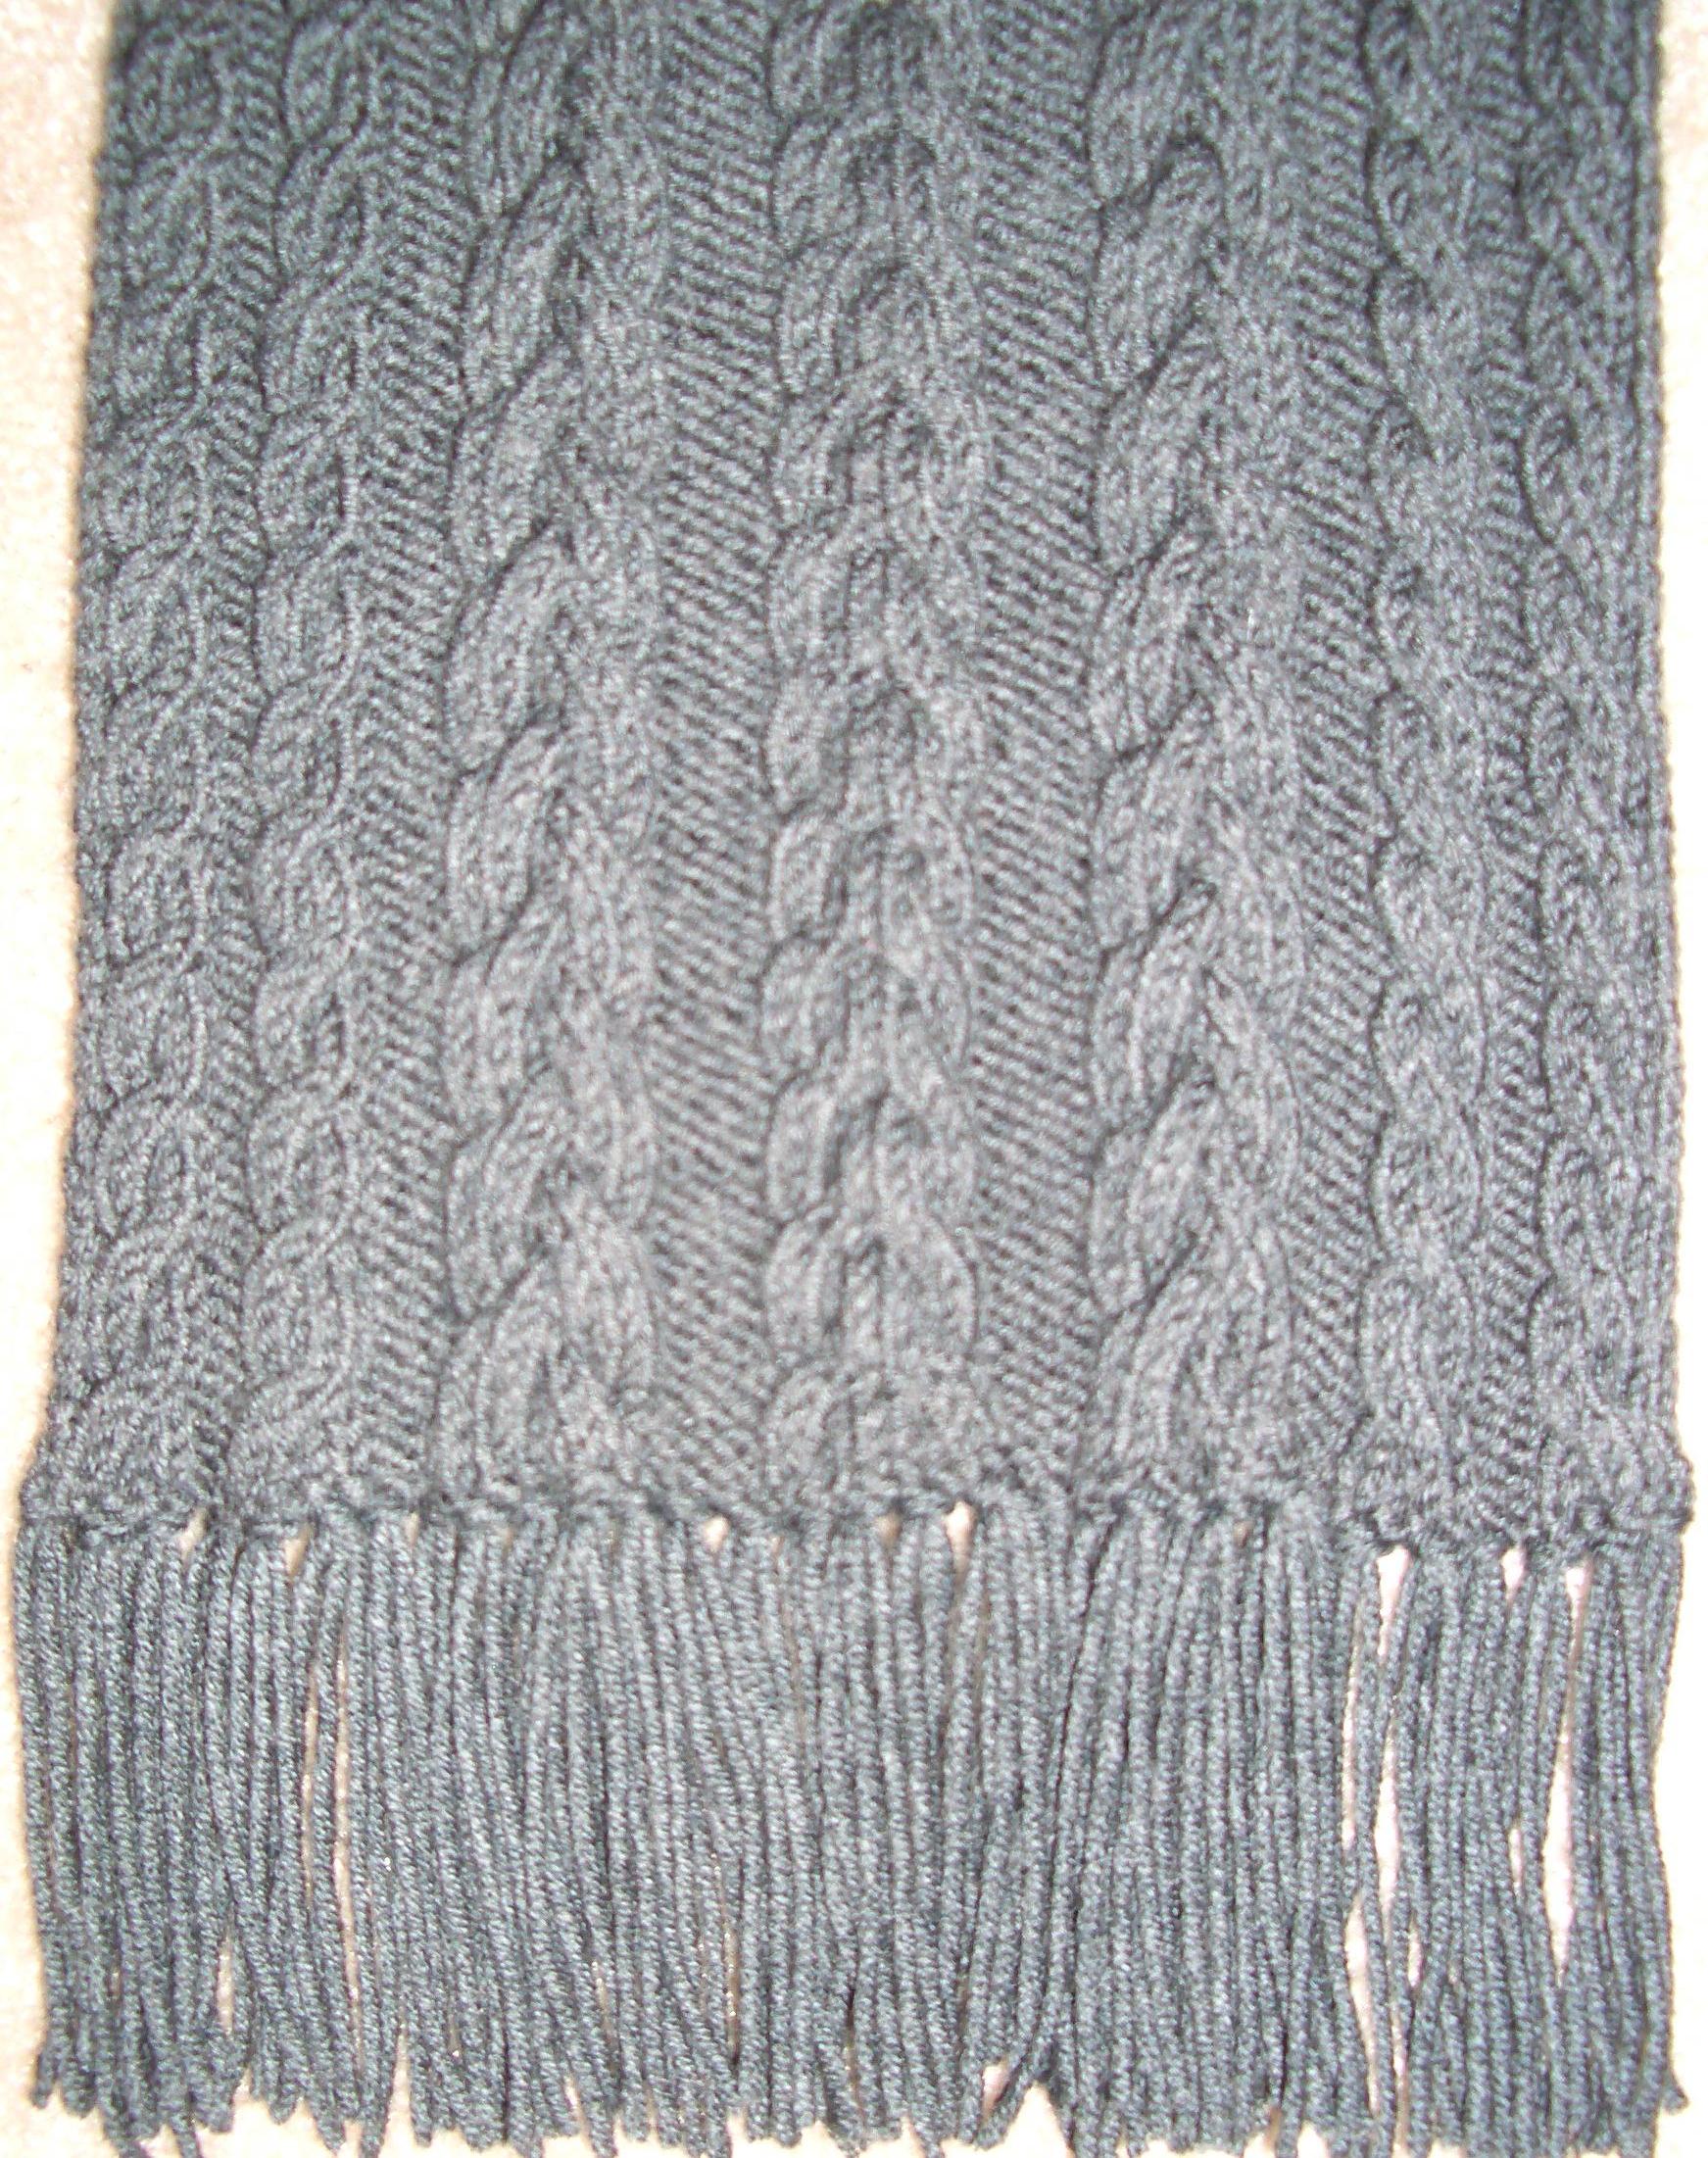
The finished product is about 6 1/2" wide and 57" long, excluding 3" of fringe on either end.  I usually don't add fringe to scarves since it gets ratty and messy pretty easily, but the edge of this scarf needed it to visually smooth out the wavy edges of the cables.  It took me about an hour to add the fringe and I think the result is well worth the time.  If (when) I make this scarf again, I'll add a couple of rows of crochet to the short edges to further smooth the transition between the cables and the fringe.

I'm quite pleased with the way it came out and I hope she enjoys it.

Note to self: never admire anything aloud.
Detail of Knitted Cables.JPG
Materials:
5 - 50g (1.75oz.) skeins Zara Merino yarn (gray - color 1468)
size 4 (3.5 mm) knitting needles
size E (3.5 mm) crochet hook for easy bind off and fringe application (optional)
1 skein of yarn for fringe (optional)

Stitches:

C4(6)B = Slip next 2(3) sts onto cable needle and hold at back of work, K2(3), then K2(3) from cable needle.
C4(6)F = Slip next 2(3) sts onto cable needle and hold at front of work, K2(3), then K2(3) from cable needle.
 
Instructions:
Cast on 70 sts.
Row 1 (Right Side): P2, K4, P3, K4, P4, K9, P5, K8, P5, K9, P4, K4, P3, K4, P2.
Row 2 and all even rows: K2, P4, K3, P4, K4, P9, K5, P8, K5, P9, K4, P4, K3, P4, K2.
Row 3: P2, K4, P3, K4, P4, C6F, K3, P5, K8, P5, C6F, K3, P4, K4, P3, K4, P2.
Row 5: P2, C4F, P3, C4F, P4, K9, P5, C4F, C4B, P5, K9, P4, C4B, P3, C4B, P2.
Row 7: P2, K4, P3, K4, P4, K3, C6B, K3, P5, K8, P5, K3, C6B, P4, K4, P3, K4, P2.
Row 9: Repeat Row 1.
Row 11: P2, C4F, P3, C4F, P4, C6F, K3, P5, C4F, C4B, P5, C6F, K3, P4, C4B, P3, C4B, P2.
Row 13: Repeat Row 1.
Row 15: Repeat Row 7.
Row 17: Repeat Row 5.
Row 19: Repeat Row 3.
Row 21: Repeat Row 1.
Row 23: P2, C4F, P3, C4F, P4, K3, C6B, P5, C4F, C4B, P5, K3, C6B, P4, C4B, P3, C4B, P2.
Row 24: Repeat Row 2.
Repeat Rows 1-24 until approximately 57" from beginning (or your desired length).

Finishing:
Bind off. 
Weave in all ends. 
Optional fringe:
  • Wrap the yarn around a piece of sturdy cardboard cut to the desired finished length of your fringe.  (Don't wrap too tightly, as the suggested yarn will stretch.)
  • Cut along one edge of the cardboard to yield pieces twice the length of your cardboard's width.
  • Starting at a corner of the short end of the scarf, insert the crochet hook from back to front.
  • Fold two strands of your fringe yarn in half and pull the loops through the scarf.
  • Insert the ends of the fringe yarn through the loops (forming a lark's head knot) and pull tight.
  • Repeat for every other stitch along both short ends of the scarf.
The free pattern above is for your personal use only.
Knitted Pinwheel Quilt Blanket.JPGThis blanket came about as part of my Stash Zero initiative. 

I wanted to make something very simple that I could work on when I was out of the house, and I didn't want to have to make a gauge swatch for this project.

My goal was to use color in a way that made it look more than just basic squares sewn together.  My SO's mother is a quilter, so I was thinking of her art and toying with various quilt-inspired block designs.

I knew I wanted to knit it, but I didn't want to have to do too much counting.  Also, since I was trying to use up stash yarn, I was restricted to what I had on hand.  I ended up with a design based on a simple pinwheel block, with one of the pattern triangles a different color, to add visual interest. 

The beige is the background color, and it was a deliberate decision to have the beige triangles (instead of the colored, pattern triangles) meet in the middle.  It meant that if anything shifted a little when I sewed it together, it wouldn't be as noticeable than if the green and purple points didn't meet exactly right.

Each square was machine knitted in garter stitch (knit every row) from one corner, starting with the beige.  I cast on one stitch and increased at the end of each row for 100 rows (until there were 100 stitches on the needle), then worked one row even and changed to the pattern color.  In the pattern color, I decreased at the end of each row by knitting two together through the back loops at the end of every row until there are two stitches left on the needle, then bound off.

The single-crochet border's design was based on tying the purple in to the whole.  Without the purple edge of the border, the purple triangle wouldn't look as if it belonged there.  The green stripe in the border was so I could use up as much green as possible.  That's also what determined the thickness of the beige stripes in the border.  It came out looking exactly right, I'm thrilled to say.  I especially like that the heft and weight of the crocheted border match that of the garter-stitched body of the blanket.
Detail of Quilt Inspired Baby Blanket.jpg
The detail picture to the right represents the colors of the yarn much better than the one above of the whole blanket.

This blanket is large (48" square, including the 3 1/2" border) and thick for a baby blanket, but I'm sure I'll find some use for it when it's time.  I'm definitely keeping this one for me.  It came out better than I thought it would and I'm completely happy with it.  That's rare, so I'm enjoying it.  And in what may be a first for me:

No new yarn was purchased to complete this project!

Materials:

  • Lion Brand Homespun Yarn
    • 4 skeins 393 Cream (Color A)
    • 3 skeins 320 Regency (Color B) - green
    • 1 skein 322 Baroque (Color C) - purple
  • No. 10 knitting needles (6.0 mm)
  • K crochet hook (6.50 mm)
  • blunt yarn needle
  • stitch markers (optional)
Squares:
Using knitting needles and Color A, cast on 1 st.
Increase by k into front and back of last (only) stitch in row.
k1, increase.
k2, increase.
k 100 rows, increasing 1 at the end of every row.
Knit one row even, then change to Color B.
k 98 with Color B, decrease by k2tog into back loops of last two stitches.
k 97, decrease.
k 96, decrease.
When 2 sts are left on needle, bind off knitwise.

Assembly:
Make three squares with Colors A and B.
Make one square with Colors A and C.
Sew squares together in pattern. 
Weave in ends at center point.

Edging:
With crochet hook, join Color A anywhere along edge on right side of work.
Round 1 (right side): sc once into edge for every two knitted rows.  3 sc into each corner.  (Optional: put marker between first and second stitch of corner.)  Join with sl st. Turn.
Round 2 (wrong side): sc in each sc.  3 sc in each corner.  Join with sl st.  Turn.
Round 3 (rs): Same as Round 2.
Round 4 (ws): Same as Round 2.
Round 5 (rs): sc in each sc.  3 sc in each corner.  Join with sl st.  Change to Color B.  Don't turn.
Round 6 (rs): Same as Round 2.
Round 7 (ws): Same as Round 2.
Round 8 (rs): Same as Round 2.
Round 9 (ws): sc in each sc.  3 sc in each corner.  Join with sl st.  Change to Color A.  Turn.
Round 10 (rs): Same as Round 2.
Round 11 (ws): Same as Round 2.
Round 12 (rs): sc in each sc.  3 sc in each corner.  Join with sl st.  Change to Color C.  Don't turn.
Round 13 (rs): sc in each sc.  3 sc in each corner.  Join with sl st.    Don't turn.
Round 14 (rs): Same as Round 2.  Bind off and weave in all ends.

The free pattern above is for your personal use only.

Categories